Manual
Server
Client
SDR-Plugin
Client Manual
Installation
If you have already installed the full version, you have implicitly installed and configured the client and - you are done! If you have the client only distribution, please follow these simple steps:
- Extract the client distribution of the IMoD system using the tar -xvzf
imod_client_bin_v2.0a.tar.gz command. The distribution should
contain the following directories and files:
	imod-client/			        IMoD home
	imod-client/README		        The readme file
	imod-client/.sap		        Settings for sdr announcements
	imod-client/imod_client		        Startup script for UNIX
	imod-client/bin/imod_client.bat	        Startup script for Windows
	imod-client/bin/imod_lclient.jar	Java client
- Adapt paths in imod-client/imod_client and/or imod-client/imod_client.bat to your configuration. Please use JDK1.2 or above to run the IMoD client. To our experience, the initial release of JDK1.3 is buggy. So please use either JDK1.2 or JDK1.3_01 or above.
- For the proper playback of RTP/I-based media streams,
it is necessary that the clocks of all systems (recorder and
applications) are synchronized e.g. via NTP. For Solaris and
Linux, the standard ntpd will do the job. For Windows platforms
we've made good experiences with Dimension 4.
Note: Please assure that the clocks are tightly synchronized. NTP supports a mode in which clocks converge slowly. This mode assures synchronization only in the long term and is not a good fit here.
Client Operation
Login
Once started, the client presents a login window (see below) where a valid name/password combination and the address of the IMoD server can be entered (see image below). If the check box "Login as guest" is selected, the user will not be prompted for name and password and restricted access will be granted. In this mode, the creation of new or the modification of existing recordings is possible.
Note: In order to enable guest login for a server, a user "guest" with password "guest" must be defined. (See the -admin option in the server manual.)

Playback
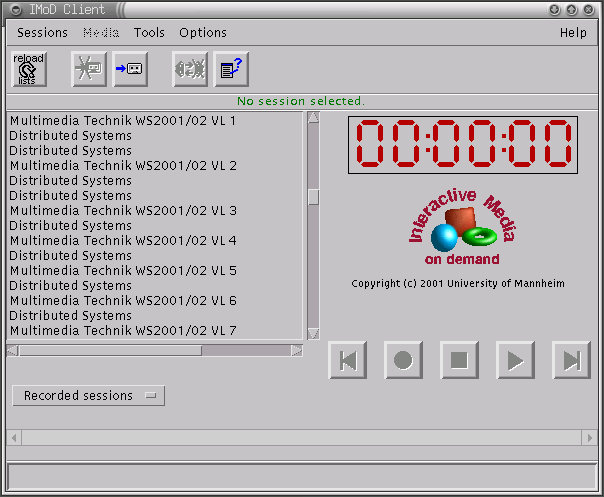
Select the entry Recorded sessions in the Choice Box on the left side to view a list of recorded sessions available on the IMoD server (see image below). Connect to a session by double clicking or by selecting it and pressing the button with the blue arrow in the button bar. Other options are available via the Sessions Menu:
- Select Session: Connect to the selected session.
- Delete Session: Delete the selected session on the IMoD server. This removes the recording from the hard disk of the IMoD server.
- Re-read Session lists: Reload session list from server.
- Info about Session: Display infos about the selected session.
- Exit: Disconnect from server and exit.

Once connected to a session, the available media tracks are displayed on the left hand side (see image below). IMEDIA stands for an interactive media track (e.g. a shared whiteboard).
Playback can be controlled with the VCR style buttons on the right side. To execute random access, move the slider of the scrollbar to the desired position and press the play button.

The following options are available in the Options Menu:
- Loop mode: Playback is restarted if the end of a session is reached.
- Unicast mode: In regular mode, recordings are played back to the address specified in the session description. Typically, this address is a multicast address. If the "Unicast mode" is checked, the description is modified so that the recording is played back to the address of the client. Unicast mode is default for the "guest login".
The IMoD client does not display the media streams played
back. I.e. the IMoD client does not contain a video decoder. Instead,
a user can start the tools of her choice to view the media
streams played back. The Tools Menu suggests a command
that can be used to start the traditional MBone tools as receiver
applications for each media track.
Hint:This is also an easy way to find out to which
addresses the media streams of a recording are played to.
The Media Menu can be used to modify single media tracks. Please select a track before clicking on one of the following options:
- Mute/unmute media: Enable/disable playback of the selected media track. Can be used e.g. to suppress the playback of high bandwidth video.
- Delete media: Removes the selected media track from the recording.
- Edit media: Edit address, TTL and other parameters of the selected media track.
- Info about media: Display address, TTL and other parameters of the selected media track.
Options available via the Sessions Menu are:
- Deactivate session: Put the current session into the background and return to session list. This session stays alive, i.e. it keeps playing or recording! Control over the session can be regained by selecting Selected sessions in the Choice Box on the left side.
- Deselect session: Disconnect from the current session.
- Play at... / Record at... / Stop at...: Schedule the execution of a command.
- Edit Session: Edit description, address, TTL and other parameters of the selected session and its media tracks. Unicast mode can also be selected via the Edit Session dialog.
- Info about Session: Display infos about the current session.
- Exit: Disconnect from server and exit.
Recording
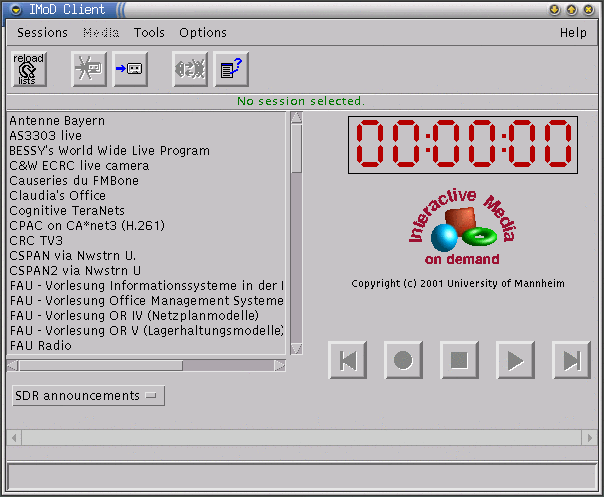
Select the entry SDR Announcements in the Choice Box on the
left side. A list of sessions that are currently announced on
the MBone (e.g. using sdr)
are displayed. To record your own session, you must first create an
announcement (e.g. using sdr)
for that session. (To create announcements containing an entry for a
RTP/I-based media, you will need this SDR-Plugin.) As soon as your new
announcement appears in the "SDR Announcement" list, it can be
selected an recorded.
Note 1: sdr announces sessions periodically. Thus, it
may take a while until the session you want to record appears in the
list.
Note 2: The IMoD server is a little picky about
announcements. So please take care when creating an announcement and
fill in every field offered by sdr.

Connect to a session by double clicking or by selecting it and pressing the button with the blue arrow in the button bar. Now you are ready to record the session by pressing the red button.
Most options that are available via the menus are the same as for playback (see above).
Regain Control over a Background Session
A session can be put in the background via the "Sessions | Deactivate
Session" menu. A session in the background remains active, i.e. it
keeps on playing back or recording. To view all background sessions,
select the entry Selected Sessions in the Choice Box on
the left side. Control over such a session can be regained by
selecting it (via a double click or the button with the blue arrow on
it). The session can be terminated by selecting it and disconnecting
from it afterwards.
Volker Hilt <hilt@informatik.uni-mannheim.de>