How to prepare an MBone session as the sender
If you are planning an Mbone transmission you may wish to pursue the
following procedure which has been useful to us during the recent
years:
- Check your machines and Mbone connectivity first. Are the tools
installed correctly? Does the hardware work (video grabber, sound
card, camera, microphone)? Is your machine connected to the Mbone? You
should check all this at the location where the actual transmission
will take place!
- Schedule not only the actual event but also at least one test
session. This means e.g. room reservations, etc. (See the article on
Mbone debugging for details of the test session.)
- Set up an SDR entry (see below) for your session and the test
session. Choose a session name that starts with COST264. Use the same
parameters (esp. TTL) as are planned for the actual transmission.
- Announce your session on the COST mailing list together with the
technical details of the transmission and the test session (SDR
entries, addresses, times, etc.) Remind the participants of the
importance of the test session.
- Send a reminder on the day of the test session and another
reminder on the day of your event.
- Keep your equipment readily checked. (e.g. don't lend equipment
between the test session and the event.)
How to set up an SDR entry
Unlike unicast addresses where the DNS structure provides a global
naming mechanism no such tool exists with multicast
addresses. However, the sdr-tool allows you to advertise your session
by regularly broadcasting session details in the Mbone. This broadcast
mechanism has two important implications: Firstly, a client cannot
actively retrieve the session information but has to wait until the
next broadcast (usually a few minutes depending on packet
loss). Secondly, session announcements are only broadcast while your
sdr is running. If you stop it, e.g. by logging off from your machine
the broadcast is stopped as well.
Please remember these crucial details: the sdr mechanism only works
properly if you set up the announcement in time and keep the tool
running until after the session. (Luckily sdr caches all its entries
so you don't need to re-enter all the data when you restart the
tool. Hence don't panic if you find that sdr is no longer running on
your machine. Just restart it.)
For the same reasons (broadcast intervals) participants of your
session have to start their sdr in time as well. Only if they can't
see your announcement after 5 minutes you can assume a problem with
the announcement.
In order to announce your session please pursue the following procedure:
- Start sdr and click on the menue item new - create
session. You will be presented with a sequence of dialogs:
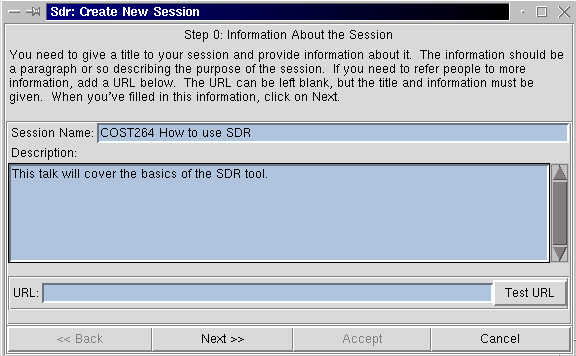
First enter the name of your session and a short
description. This could be the talk's abstract. It is convenient to
choose a session name that starts with COST264 since it helps
other participants to find your entry in their potentially long list
of sessions.
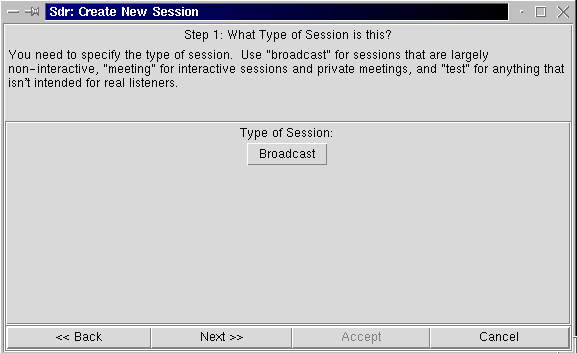
- Choose the session type. For a normal talk this should be
broadcast. (This has no technical implications but helps the users to
find interesting session.
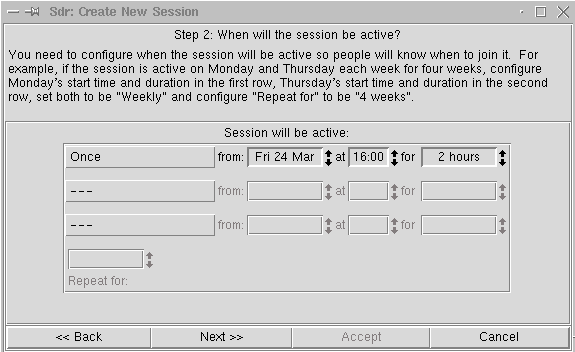
- Set up the session's time-table. Remember that you also want to
schedule at least one test session!
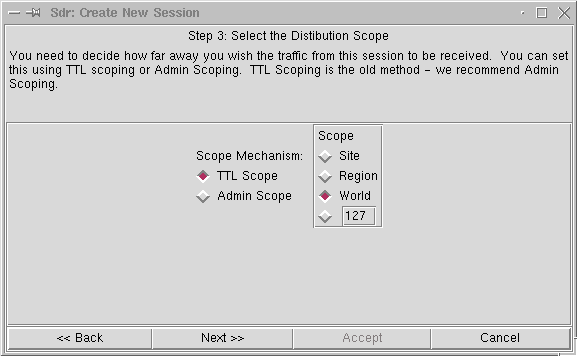
- Set up the session's distribution scope, its so-called TTL (time
to live). If you are sure that all systems involved are able to deal
with administrative scope you should choose that option. Otherwise
select TTL scope and check the appropriate scope. As agreed on the
Pisa meeting COST sessions should be transmitted with world scope.
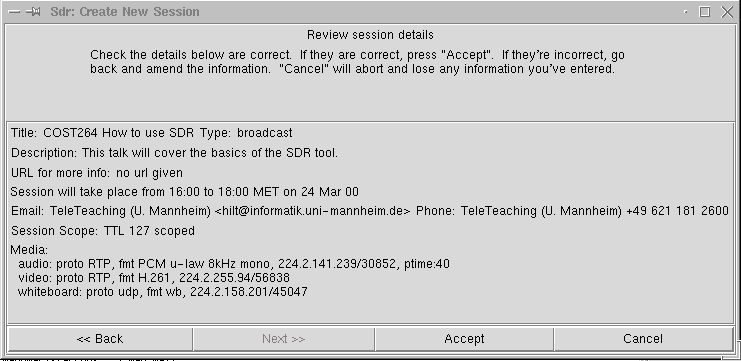
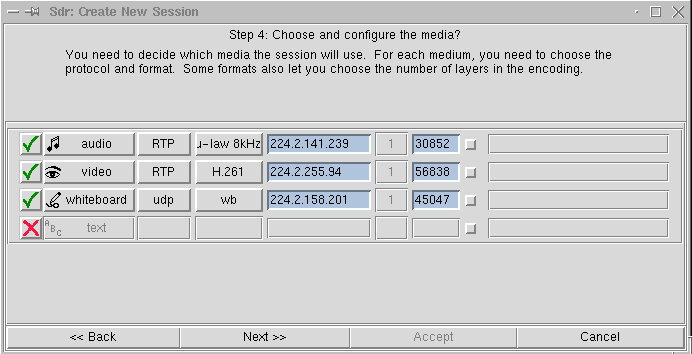
- Create transmission groups for all media types that will be used
during the session by clicking on the respective buttons. The sdr-tool will
then automatically create all addresses and parameters that you see in
the screenshot below. You may change these parameters if required.
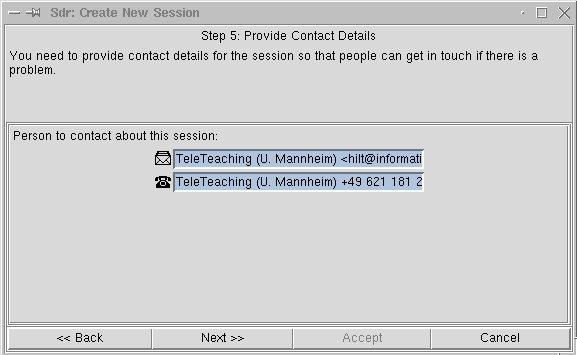
- Add your contact information, i.e. e-mail address and phone number:
- Finally, you may check again all the information that you have provided and
then create the session by clicking accept:
